


Blog
Octagon Motif Crochet Blanket tutorials (Beginner-Friendly)

Stuson |Octagon Motif Crochet Blanket tutorials
Hi, welcome to my crochet blog. I often share free crochet tutorials here, and I also sell a small number of finished crochet pieces in my shop. If you want to start with something smaller first, you can check my Crochet Mushroom Tutorial and my Crochet Leaf Tutorial. This time, I’m sharing a bigger project: an octagon motif blanket. It looks complex at first, but the good news is that it’s built from repeat pieces, so once you finish one motif, everything gets much easier.
This blanket is made from three parts: the main octagon motifs, two small fan sections added onto each octagon, and granny squares that fill the gaps between octagons. After you have enough pieces, you join them, and then you finish the whole blanket with a border. So the workflow is simple: make one full set first, confirm you like the size, and then repeat.
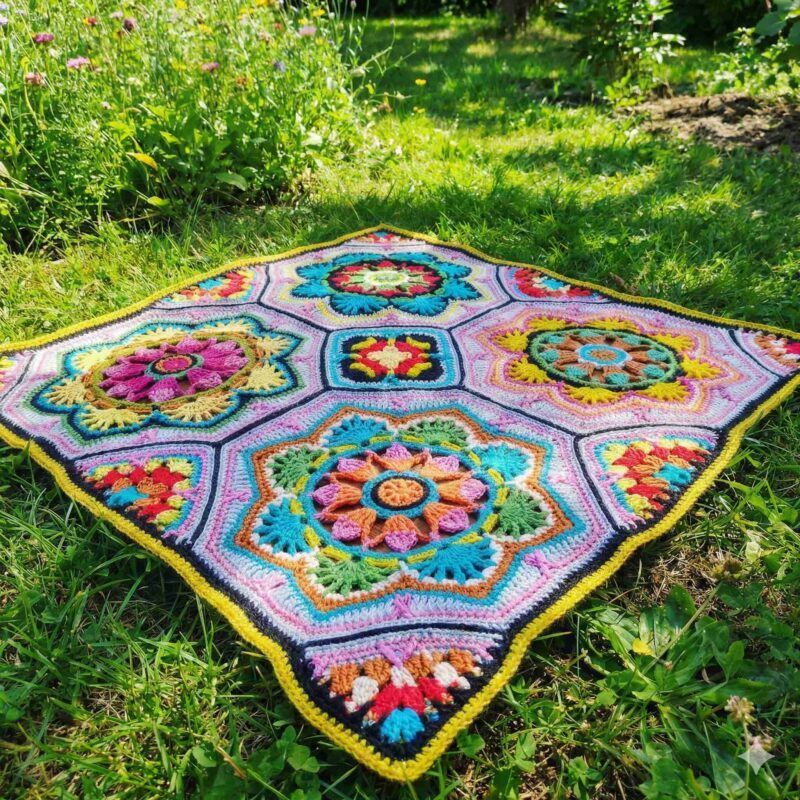
What you need
You can use almost any yarn for this. Scraps look amazing, while one or two colors look clean and modern. For the hook, just follow your yarn label as a starting point. A yarn needle is important because there will be ends to weave in, especially if you change colors often. A stitch marker also helps, because there is one small space you’ll want to remember later.
In this pattern you’ll use basic stitches: chain (ch), slip stitch (sl st), single crochet (sc), half double crochet (hdc), double crochet (dc), and treble crochet (tr). Don’t worry if you’re new—most of the blanket is chains + single crochet + double crochet, and the treble only shows up in a few places.
Part 1: The octagon motif (the main piece)
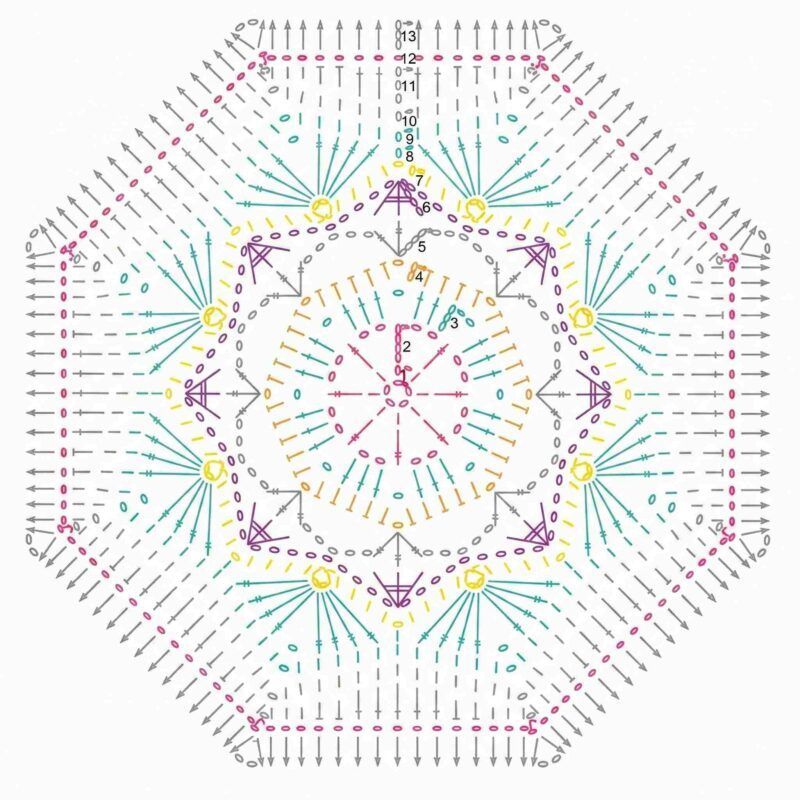
You will work in rounds, starting from a small ring.
To begin, make a ring with chains, then build eight “spokes” around it. After that, you’ll add single crochets to make the ring firm. Next, you’ll create bigger chain loops, which later become the octagon points. At this stage, it helps to pause and look at your shape—if the motif already looks like it has eight evenly spaced sections, you’re on track.
Once the big loops are in place, you’ll crochet groups of double crochets and chain spaces to give the octagon its structure. Then a treble cluster round adds a more “textured” look. Right after that, you’ll fill the chain spaces with single crochet so the edge becomes stable and easy to build on.
Now, here is an important beginner step: place a stitch marker in one of the small chain spaces you just made. This marker is only there to make the next part easier, so you don’t have to guess where to attach the fan section later.
Part 2: Add the two fan sections (do this on every octagon)
Each octagon gets two fans, and they sit opposite each other.
Start by attaching yarn at a marked chain space. Instead of rushing, take a second to check your tension, because neat fans make the final blanket edge look much cleaner. The first fan row is basically a short strip made from half double crochets with small chain spaces. After you finish that row, turn your work and make the second row with chain spaces again, which creates a gentle “fan” shape.
Next, you will repeat the same fan on the other side of the octagon. A simple way to find the opposite side is to fold the octagon in half lightly—then the second fan spot becomes obvious.
Part 3: Continue shaping rounds (this is what makes it look polished)
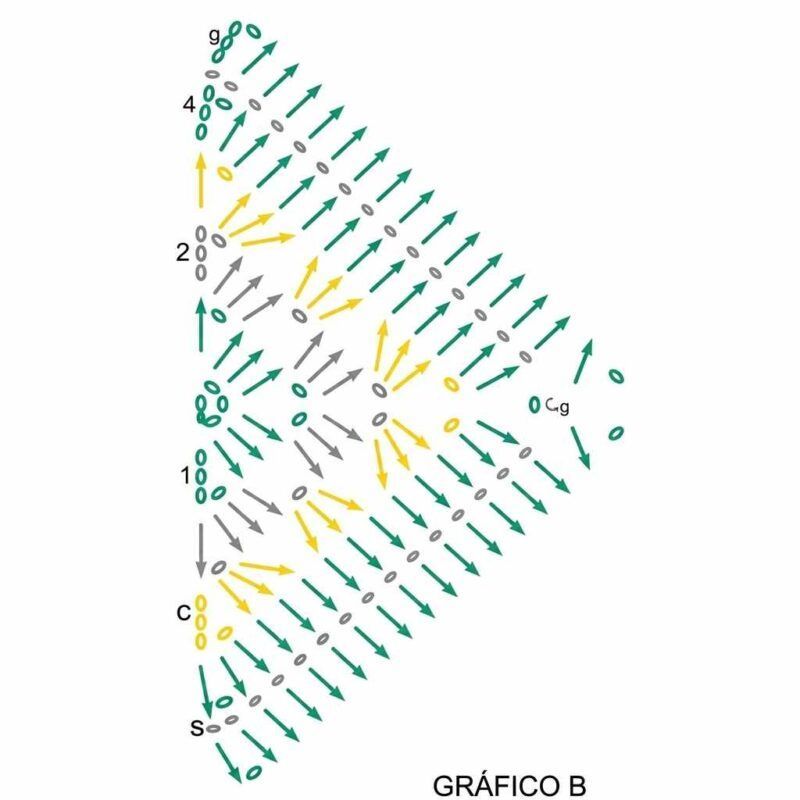
After both fans are done, you go back to working in rounds around the octagon.
At this point, the pattern uses a few rounds that create chain spaces and then fills them back in with single crochet. The reason is simple: those rounds help the octagon become flatter and more even. Later on, there are also rounds where you single crochet across longer sections and skip stitches in a repeating rhythm. This is what gradually turns the edges into straighter sides, so joining becomes easier.
Then, you’ll see a round that mixes single crochet, double crochet, and treble crochet. This adds a nice texture change without making the pattern hard. Finally, there is a round that uses post stitches (working around the “body” of a stitch instead of the top loops). That detail is optional for absolute beginners, but it does make the motif look more dimensional. If post stitches feel confusing, practice on a small swatch first, and then come back—this is exactly the kind of thing that gets easier after you do it once or twice.
After the first octagon is finished, I strongly suggest making one more octagon right away. That way, you’ll know your tension is consistent before you make a whole pile.
Part 4: The granny squares (the filler pieces)
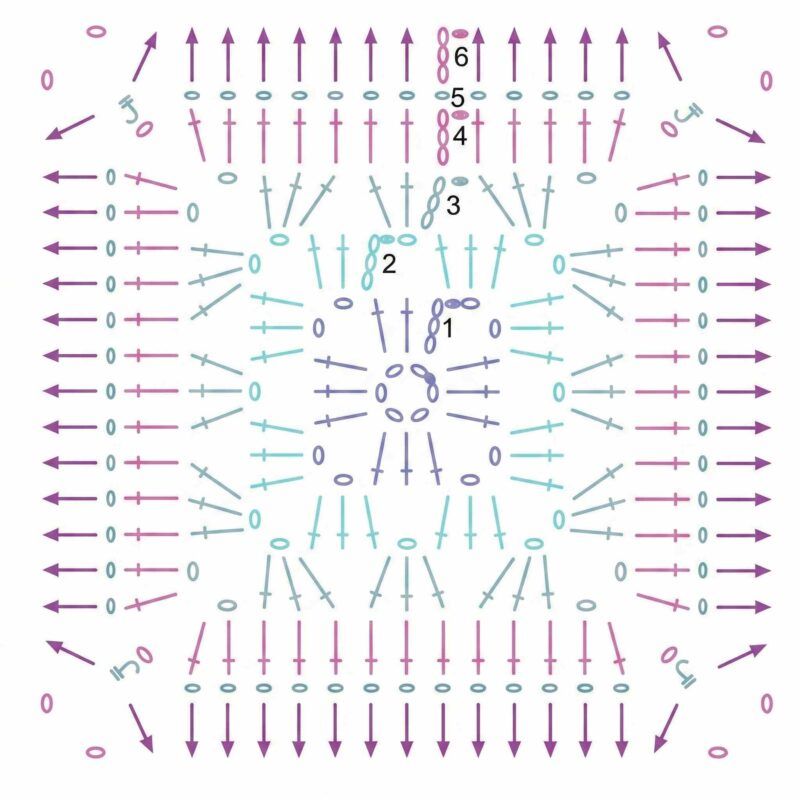
Now you need granny squares to fill the gaps between octagons.
A classic granny square starts from a small ring, then builds four corners using double crochet clusters. After that, you simply grow the square by repeating corner clusters and side clusters. Later rounds add a single crochet edge and a little texture, which helps the square match the “finished” look of the octagon.
Before you make many squares, do this simple test: place one granny square between two octagons (just on the table, without joining). If the spacing looks right, you can confidently start repeating.
Part 5: Layout + joining (easy methods that beginners can handle)
Once you have enough octagons and squares, lay everything out on a bed or the floor. This step matters, because it lets you fix color placement before anything is permanent. After you like the layout, you can join the pieces.
For joining, there are three beginner-friendly options:
-
Single crochet join: strong and forgiving, with a visible ridge.
-
Slip stitch join: flatter and still easy.
-
Sewing join: neat and clean, but slightly slower.
Personally, for beginners, single crochet join is usually the easiest because you can see your stitches clearly, and it holds up well on a blanket.
Part 6: Border edging (the finishing step)
After all pieces are joined, you crochet around the entire outer edge.
First, go around with single crochet to create a solid base. Next, you can add a decorative round using small repeating clusters. After that, build a couple more rounds to smooth everything out. Toward the end, you can add a gentle wave effect by placing small increases at a regular rhythm. If your border starts to ruffle too much, that means you’re adding too many stitches; however, if the edge starts pulling tight, you need a few extra stitches around corners or joins. In the end, the border should lie flat and feel even when you spread the blanket out.
Pattern credit (original inspiration)
This is my expanded, beginner step-by-step version, written in my own words with extra details and tips. If you want to see the original pattern that inspired this blanket, you can find it here:
Persian Crochet Blanket Free Pattern – QuiltingWonders