Blog
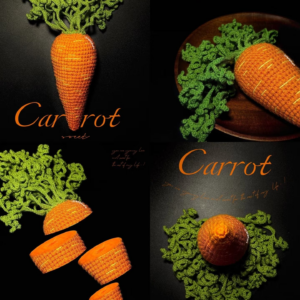
Crochet Carrot Amigurumi Tutorial (Body + Leaves + Details)

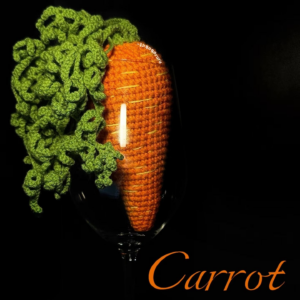
Crochet Carrot Amigurumi Tutorial (Body + Leaves + Simple Embroidery)
This is a straightforward crochet carrot amigurumi pattern. First, you will crochet the carrot body from the tip upward. Then you will add stuffing while decreasing. After that, you will switch to green yarn and close the top while leaving loops for the leaves. Finally, you will attach simple leaves and (optionally) add a few embroidery lines.
Materials and Hook Choice
For this project, use orange yarn for the body and green yarn for the leaves. Cotton yarn works well because it holds shape, and it also looks neat in photos. In addition, you will need fiberfill stuffing, a yarn needle, scissors, and a stitch marker.
For the hook size, 2.0–2.5 mm is a good range. If your stitches look loose or the stuffing shows through, use a smaller hook or tighten your tension. However, if your hands get tired, a slightly larger hook can be more comfortable.
Abbreviations and Notes
You will crochet in continuous rounds, so move the stitch marker at the start of each round. Also, the stitch counts matter, so it helps to count every few rounds.
-
MR = magic ring
-
sc = single crochet
-
inc = increase (2 sc in the same stitch)
-
dec = decrease (invisible decrease recommended)
-
BLO = back loop only
-
FLO = front loop only
Numbers in parentheses are the total stitch count for that round.

Carrot Body (Orange)
Start at the Tip
Begin with orange yarn. First, make a tight tip so the carrot looks clean.
R1: MR 6 sc (6)
R2: (sc, inc) x3 (9)
R3: 9 sc (9)
At this point, you should have a small rounded tip. Next, you will increase gradually, and you will also add “even rounds” to stretch the shape. As a result, the carrot becomes longer instead of turning into a ball.
Build the Shape (Increase + Even Rounds)
Continue with the following rounds. Work steadily, and use the stitch marker so you do not lose the round start.
R4: sc, inc, (2 sc, inc) x2, sc (12)
R5: 12 sc (12)
R6: (3 sc, inc) x3 (15)
R7: 15 sc (15)
R8: 2 sc, inc, (4 sc, inc) x2, 2 sc (18)
R9: 18 sc (18)
R10: (5 sc, inc) x3 (21)
R11: 21 sc (21)
R12: 3 sc, inc, (6 sc, inc) x2, 3 sc (24)
R13: 24 sc (24)
R14: (7 sc, inc) x3 (27)
R15: 27 sc (27)
R16: 4 sc, inc, (8 sc, inc) x2, 4 sc (30)
R17: 30 sc (30)
R18: (9 sc, inc) x3 (33)
R19: 33 sc (33)
R20: 5 sc, inc, (10 sc, inc) x2, 5 sc (36)
R21: 36 sc (36)
R22: (11 sc, inc) x3 (39)
R23: 39 sc (39)
R24: 6 sc, inc, (12 sc, inc) x2, 6 sc (42)
R25: 42 sc (42)
R26: (13 sc, inc) x3 (45)
R27: 45 sc (45)
R28: 7 sc, inc, (14 sc, inc) x2, 7 sc (48)
R29: 48 sc (48)
R30: (15 sc, inc) x3 (51)

Add Thickness (Even Rounds)
Now the carrot needs a little thickness near the top. Therefore, you will crochet a few even rounds with no increases.
R31–R34: 51 sc (51) for 4 rounds
Start decreasing. Stuff firmly as you go. It’s easier if you begin stuffing around Round 37, then add more after Round 39.
R35: (15 sc, dec) x3 (48)
R36: 3 sc, dec, (6 sc, dec) x5, 3 sc (42)
R37: (5 sc, dec) x6 (36)
R38: 2 sc, dec, (4 sc, dec) x5, 2 sc (30)
R39: (3 sc, dec) x6 (24)
Switch to Green and Close the Top
Now switch to green yarn. The goal is to tighten the opening while keeping front loops available for leaf attachment. Therefore, the last round is worked in BLO.
R40: sc, dec, (2 sc, dec) x5, sc (18)
R41: (sc, dec) x6 (12)
R42: BLO 6 dec (6)
After that, fasten off, close the opening, and weave in the ends.
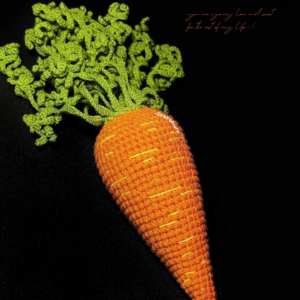
Leaves (Green)
Where to Attach the Leaves
For a full look, make 9 leaves in total. First, attach 6 leaves around the outer ring (use the available front loops). Then attach 3 leaves closer to the center. This spacing helps the top look more natural.
Simple Leaf Pattern (One Leaf)
Join green yarn to an anchor loop with a slip stitch. Next, chain a length for the leaf:
-
Long leaf: ch 18
-
Medium leaf: ch 15
-
Short leaf: ch 12
Then work back along the chain. If you want a thin leaf, use slip stitches. However, if you want a firmer leaf, use single crochet.
To add small side branches, stop about halfway back, chain 6–8, and slip stitch back down the branch. After that, continue along the main chain until you return to the base. Finally, slip stitch to finish, fasten off, and repeat until you have 9 leaves.

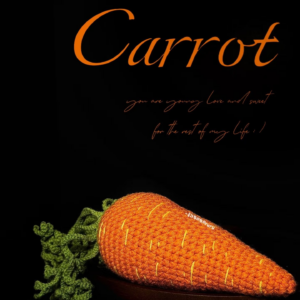
Optional Embroidery Lines
If you want more detail, add a few “carrot lines” with light yellow yarn. Keep them short and spaced out. Also, place more lines near the wider part and fewer near the tip. In addition, carry the yarn through the inside between lines so you do not leave long floats on the surface.
Notes
Congradulation to crochet carrot amigurumi.If the stuffing shows through, your hook may be too large or your tension too loose. Going down one hook size usually fixes it. If the carrot leans to one side, it’s usually uneven stuffing—add small pieces and spread them out as you fill.