Blog
Amigurumi Mushroom Crochet Pattern (Beginner-Friendly Tutorial)
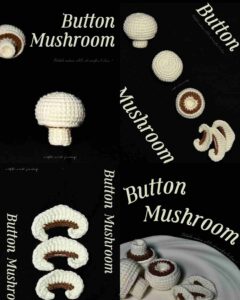
How to Crochet Adorable Amigurumi Mushrooms: A Complete 3-in-1 Tutorial
Hey fellow crafters! 🧶
If you’ve been scrolling through Pinterest or Instagram lately, you’ve probably noticed that mushrooms are everywhere. They have this cozy, cottagecore vibe that just makes any space feel a bit more magical. Today, I’m sharing a super versatile pattern that I’ve been working on.(And also I have already post another mushroom tutorial before. You also can crochet that if you want.)
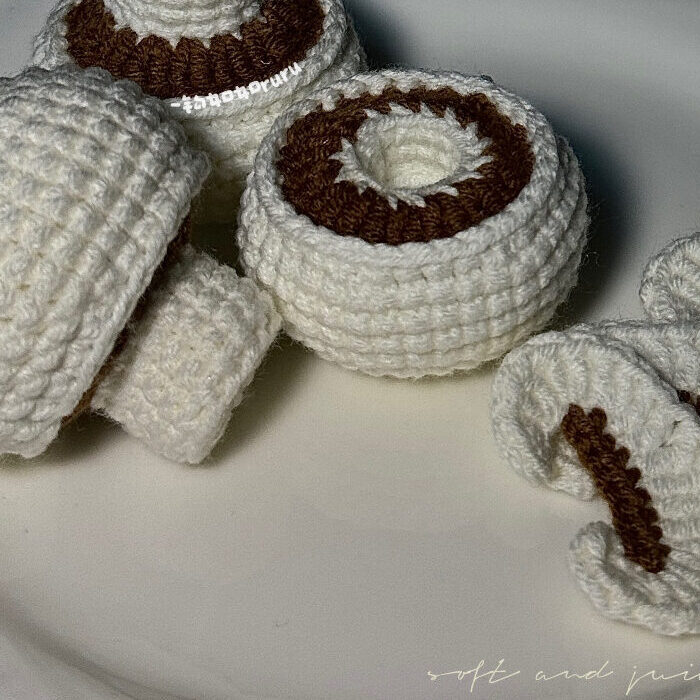
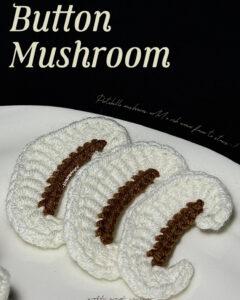
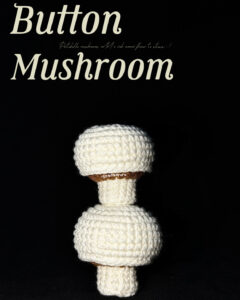
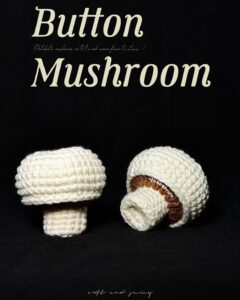
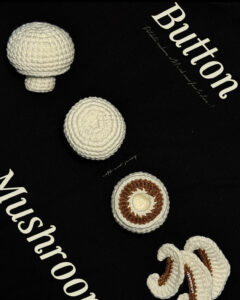
What I love about this specific tutorial is that it’s not just one mushroom—it’s three! We’ll be making a classic whole mushroom, a cute “stemless” (indented) version, and even some mushroom slices (which are honestly so satisfying to make and look great in flat-lay photos or kids’ play kitchens).
Let’s grab our hooks and get started!
What You’ll Need
-
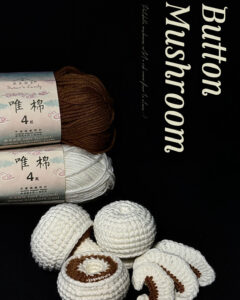
Yarn: I’m using a 4-ply combed cotton (Susu Sister’s brand is my go-to for this). You’ll need two colors: Milky White and a rich Coffee Brown.
-
Hook: A 1.8mm crochet hook (this keeps the stitches tight so the stuffing doesn’t peek through).
-
Other Bits: Fiberfill stuffing, a tapestry needle, and some stitch markers.
Part 1:The Stem
We want a flat base so it can stand up.
-
R1: 5 sc into a magic ring. (5)
-
R2: 5 increases—basically 2 sc in every stitch. (10)
-
R3: (1 sc, 1 inc) repeat 5 times. (15)
-
R4: BLO (Back Loop Only) 15 sc. This creates that sharp edge for the base. (15)
-
R5–8: Just work 15 sc all around. (15)
-
R9: Switch to your Coffee Brown yarn. We’re going to work in the FLO (Front Loop Only) here: (2 dc in each stitch) x 15. This creates that little “frill” or gills under the cap! (30)
The Cap
-
R1: 6 sc in a magic ring using Milky White. (6)
-
R2: 6 inc. (12)
-
R3: (1 sc, 1 inc) x 6. (18)
-
R4: (1 sc, 1 inc, 1 sc) x 6. I like staggering the increases like this so the cap stays perfectly round instead of hexagonal. (24)
-
R5: (3 sc, 1 inc) x 6. (30)
-
R6: (2 sc, 1 inc, 2 sc) x 6. (36)
-
R7–11: 36 sc. (36)
Assembly Tip: Don’t cut the yarn! We’re going to join the cap directly to the stem. Line them up and work (4 sc, 1 dec) x 6 through both layers. Make sure to stuff the mushroom firmly before you close it up!
Part 2: The Stemless
These are so cute for “forest floor” decor. They look like they’re just popping out of the moss.
-
The Process: Follow the Stem instructions from Part 1 for R1 through R4.
-
R5–6: Only do two rounds of 15 sc to keep the stem short.
-
R9: When you switch to brown, work in the BLO (instead of FLO) for the (2 dc in each stitch) rounds.
-
Finish: After joining it to the cap, use your finger to push the stem upwards into the cap. It creates a realistic indentation that looks just like a real button mushroom!
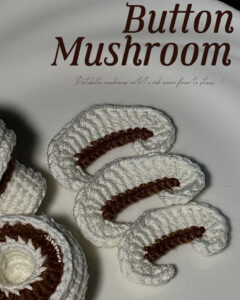
Part 3: The Mushroom Slices
These are my favorite. They add so much realism to a crochet vegetable set.
-
Foundation: With Milky White, chain 20. We’re going to work into the back bumps of the chain for a cleaner look.
-
Row 1: Follow this sequence carefully: (1 sl st, 1 sc), (1 sc, 1 hdc), (1 hdc, 1 dc), two dc-increases, 3 dc, 3 tr (treble crochets for the height), 3 dc, two dc-increases, (1 dc, 1 hdc), (1 hdc, 1 sc), and finish with (1 sc, 1 sl st).
-
The Brown Edge: Switch to Coffee Brown. Start at the 4th stitch of your row and work: 1 sl st, 11 sc, 1 sl st. This gives it that “peel” look on the outside.
Quick Tips for Success
-
Tight Tension: Since these are small, try to keep your tension consistent. If your stitches are too loose, the stuffing will show.
-
Color Play: While I used brown and white, these look amazing in bright red with white spots (classic Mario style) or even soft pastels for a nursery.
I hope you enjoyed this pattern! If you make these, please tag me—I’d love to see your little mushroom forest.
Happy Hooking! 🍄